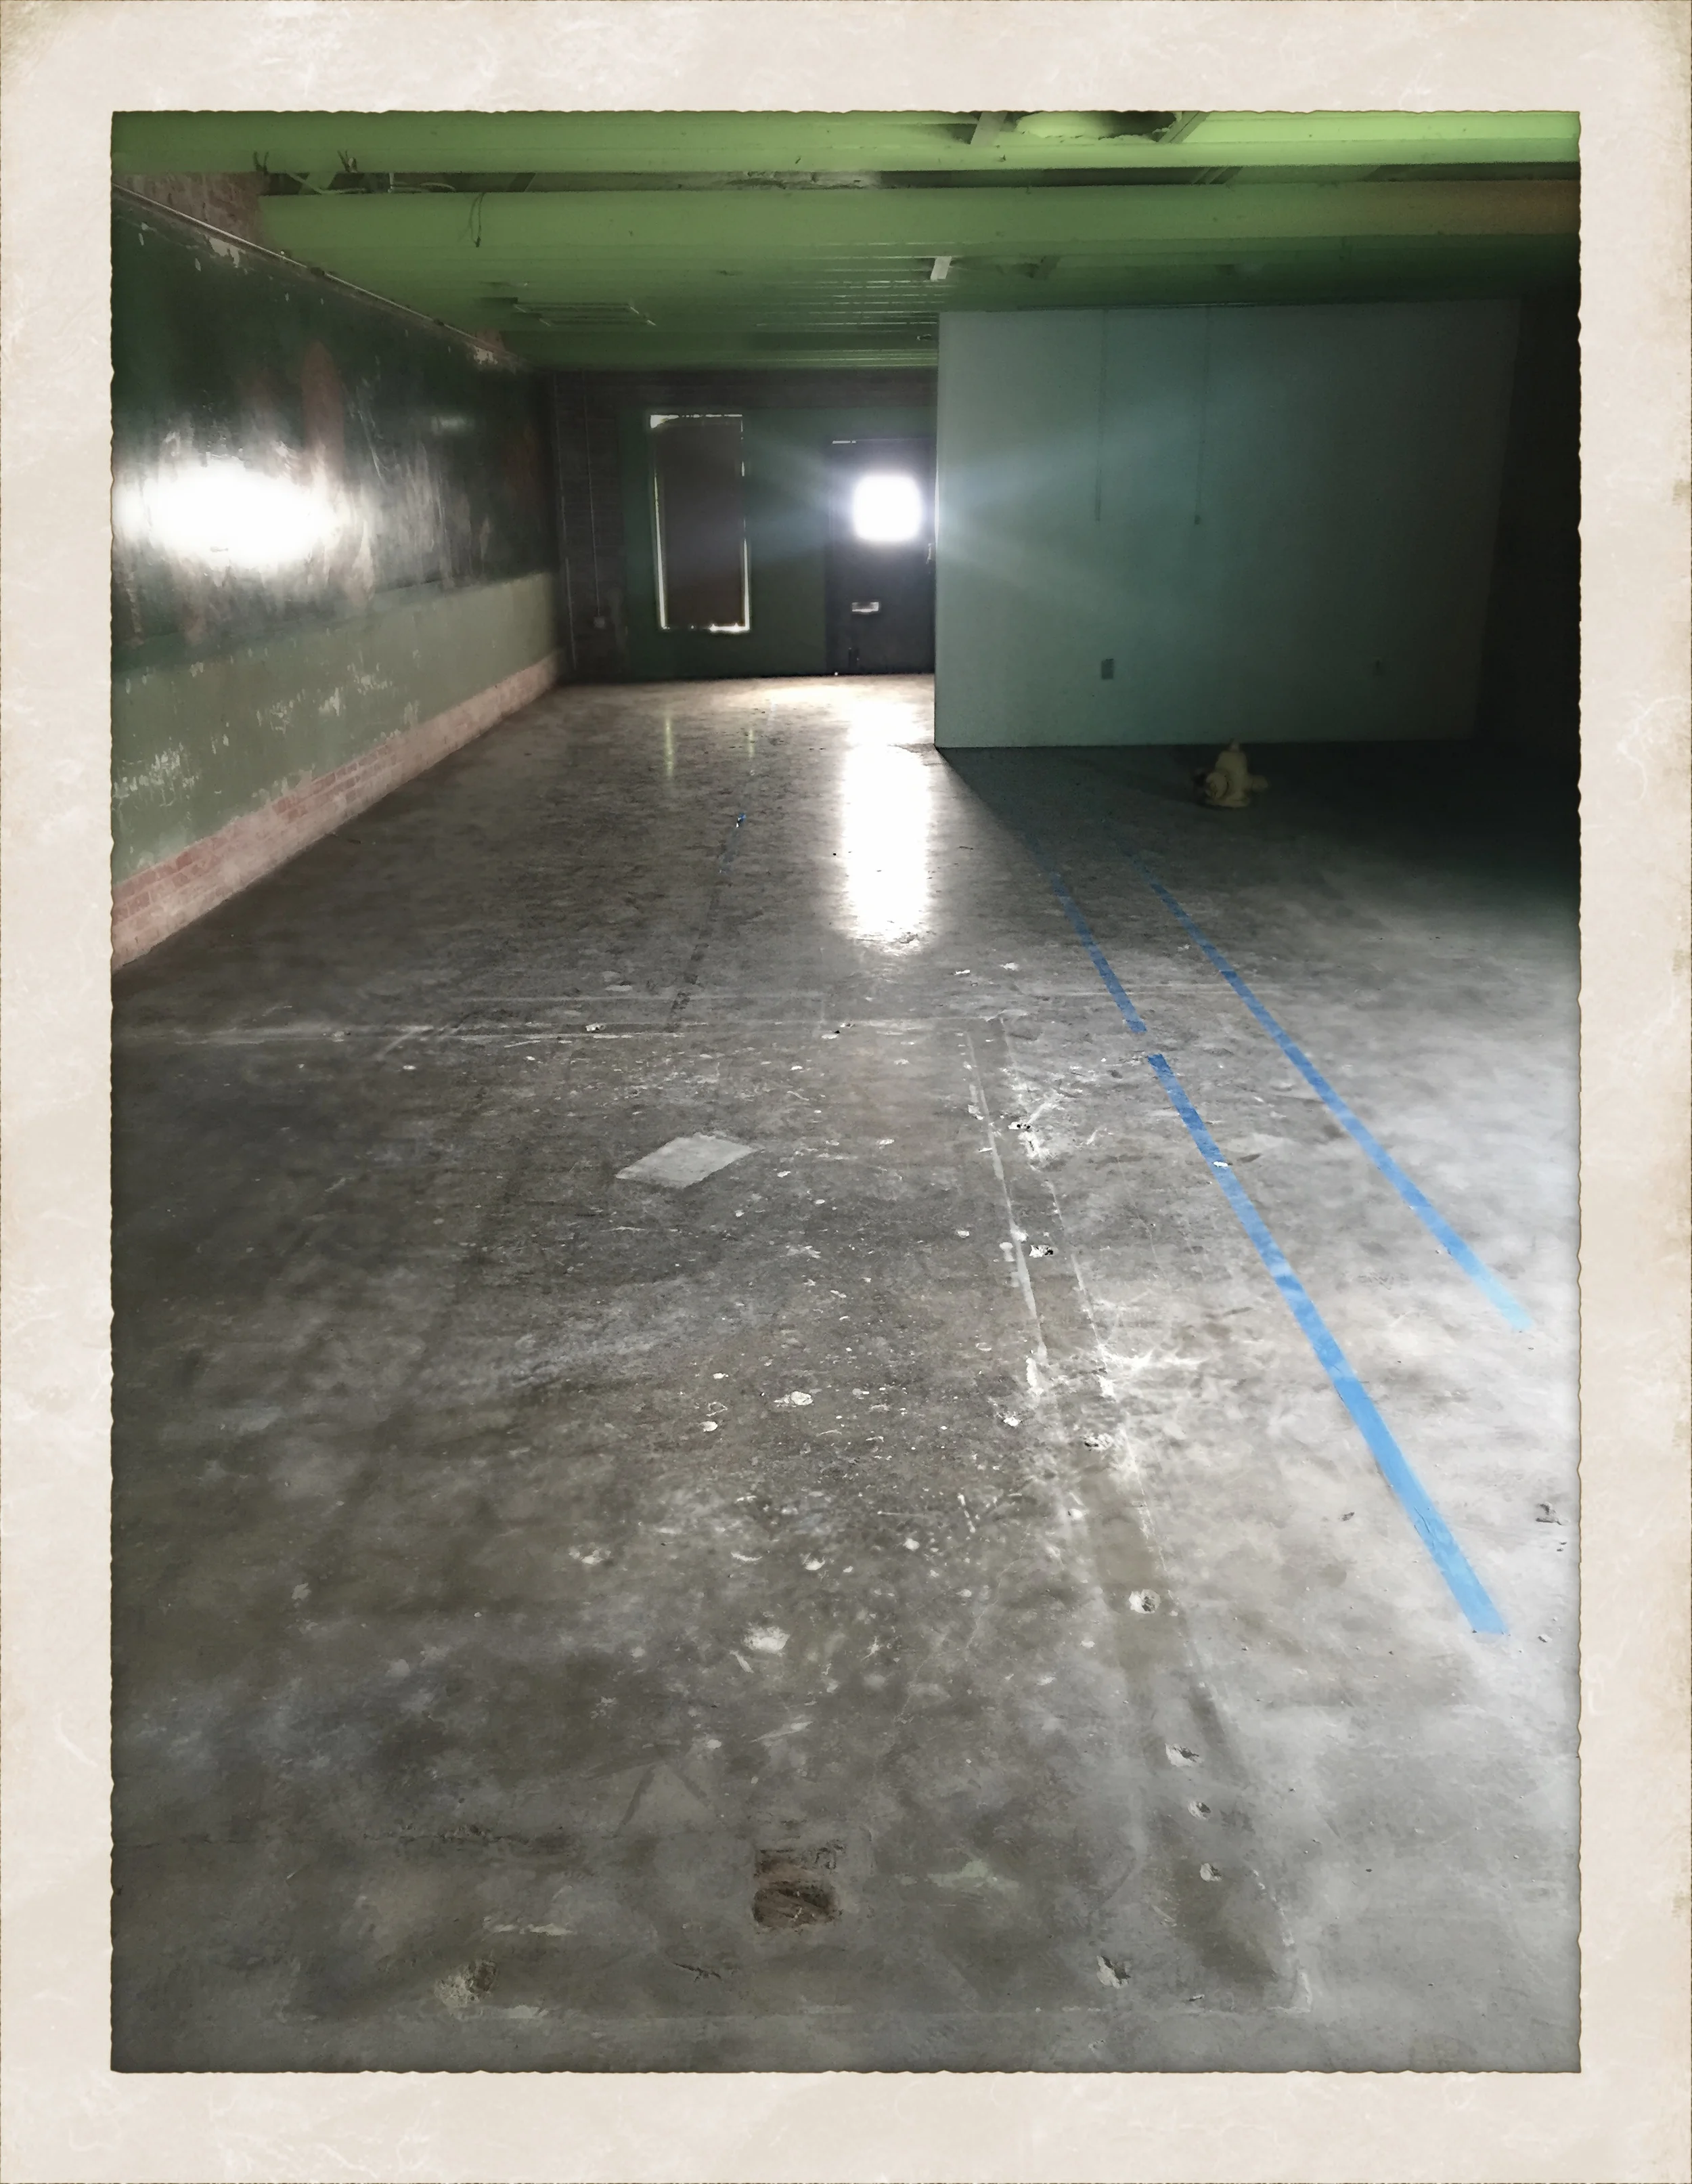
Yesterday I got to assist on my first professional photo shoot, directed by MonOrchid/Rainey Studios owner, Wayne Rainey. The plan was to archive some artwork from the walls of our immediate neighbor, GreenHaus. The owners moved out earlier this month, leaving the building empty once again, and ready for the demolition crews.
The artwork inside includes a 48’ long mural spanning the east wall and a smaller piece on the north wall. An original estimate quotes the cost of saving these paintings at over $250K, so the developer has asked us to archive the work with ultra high res photography instead.
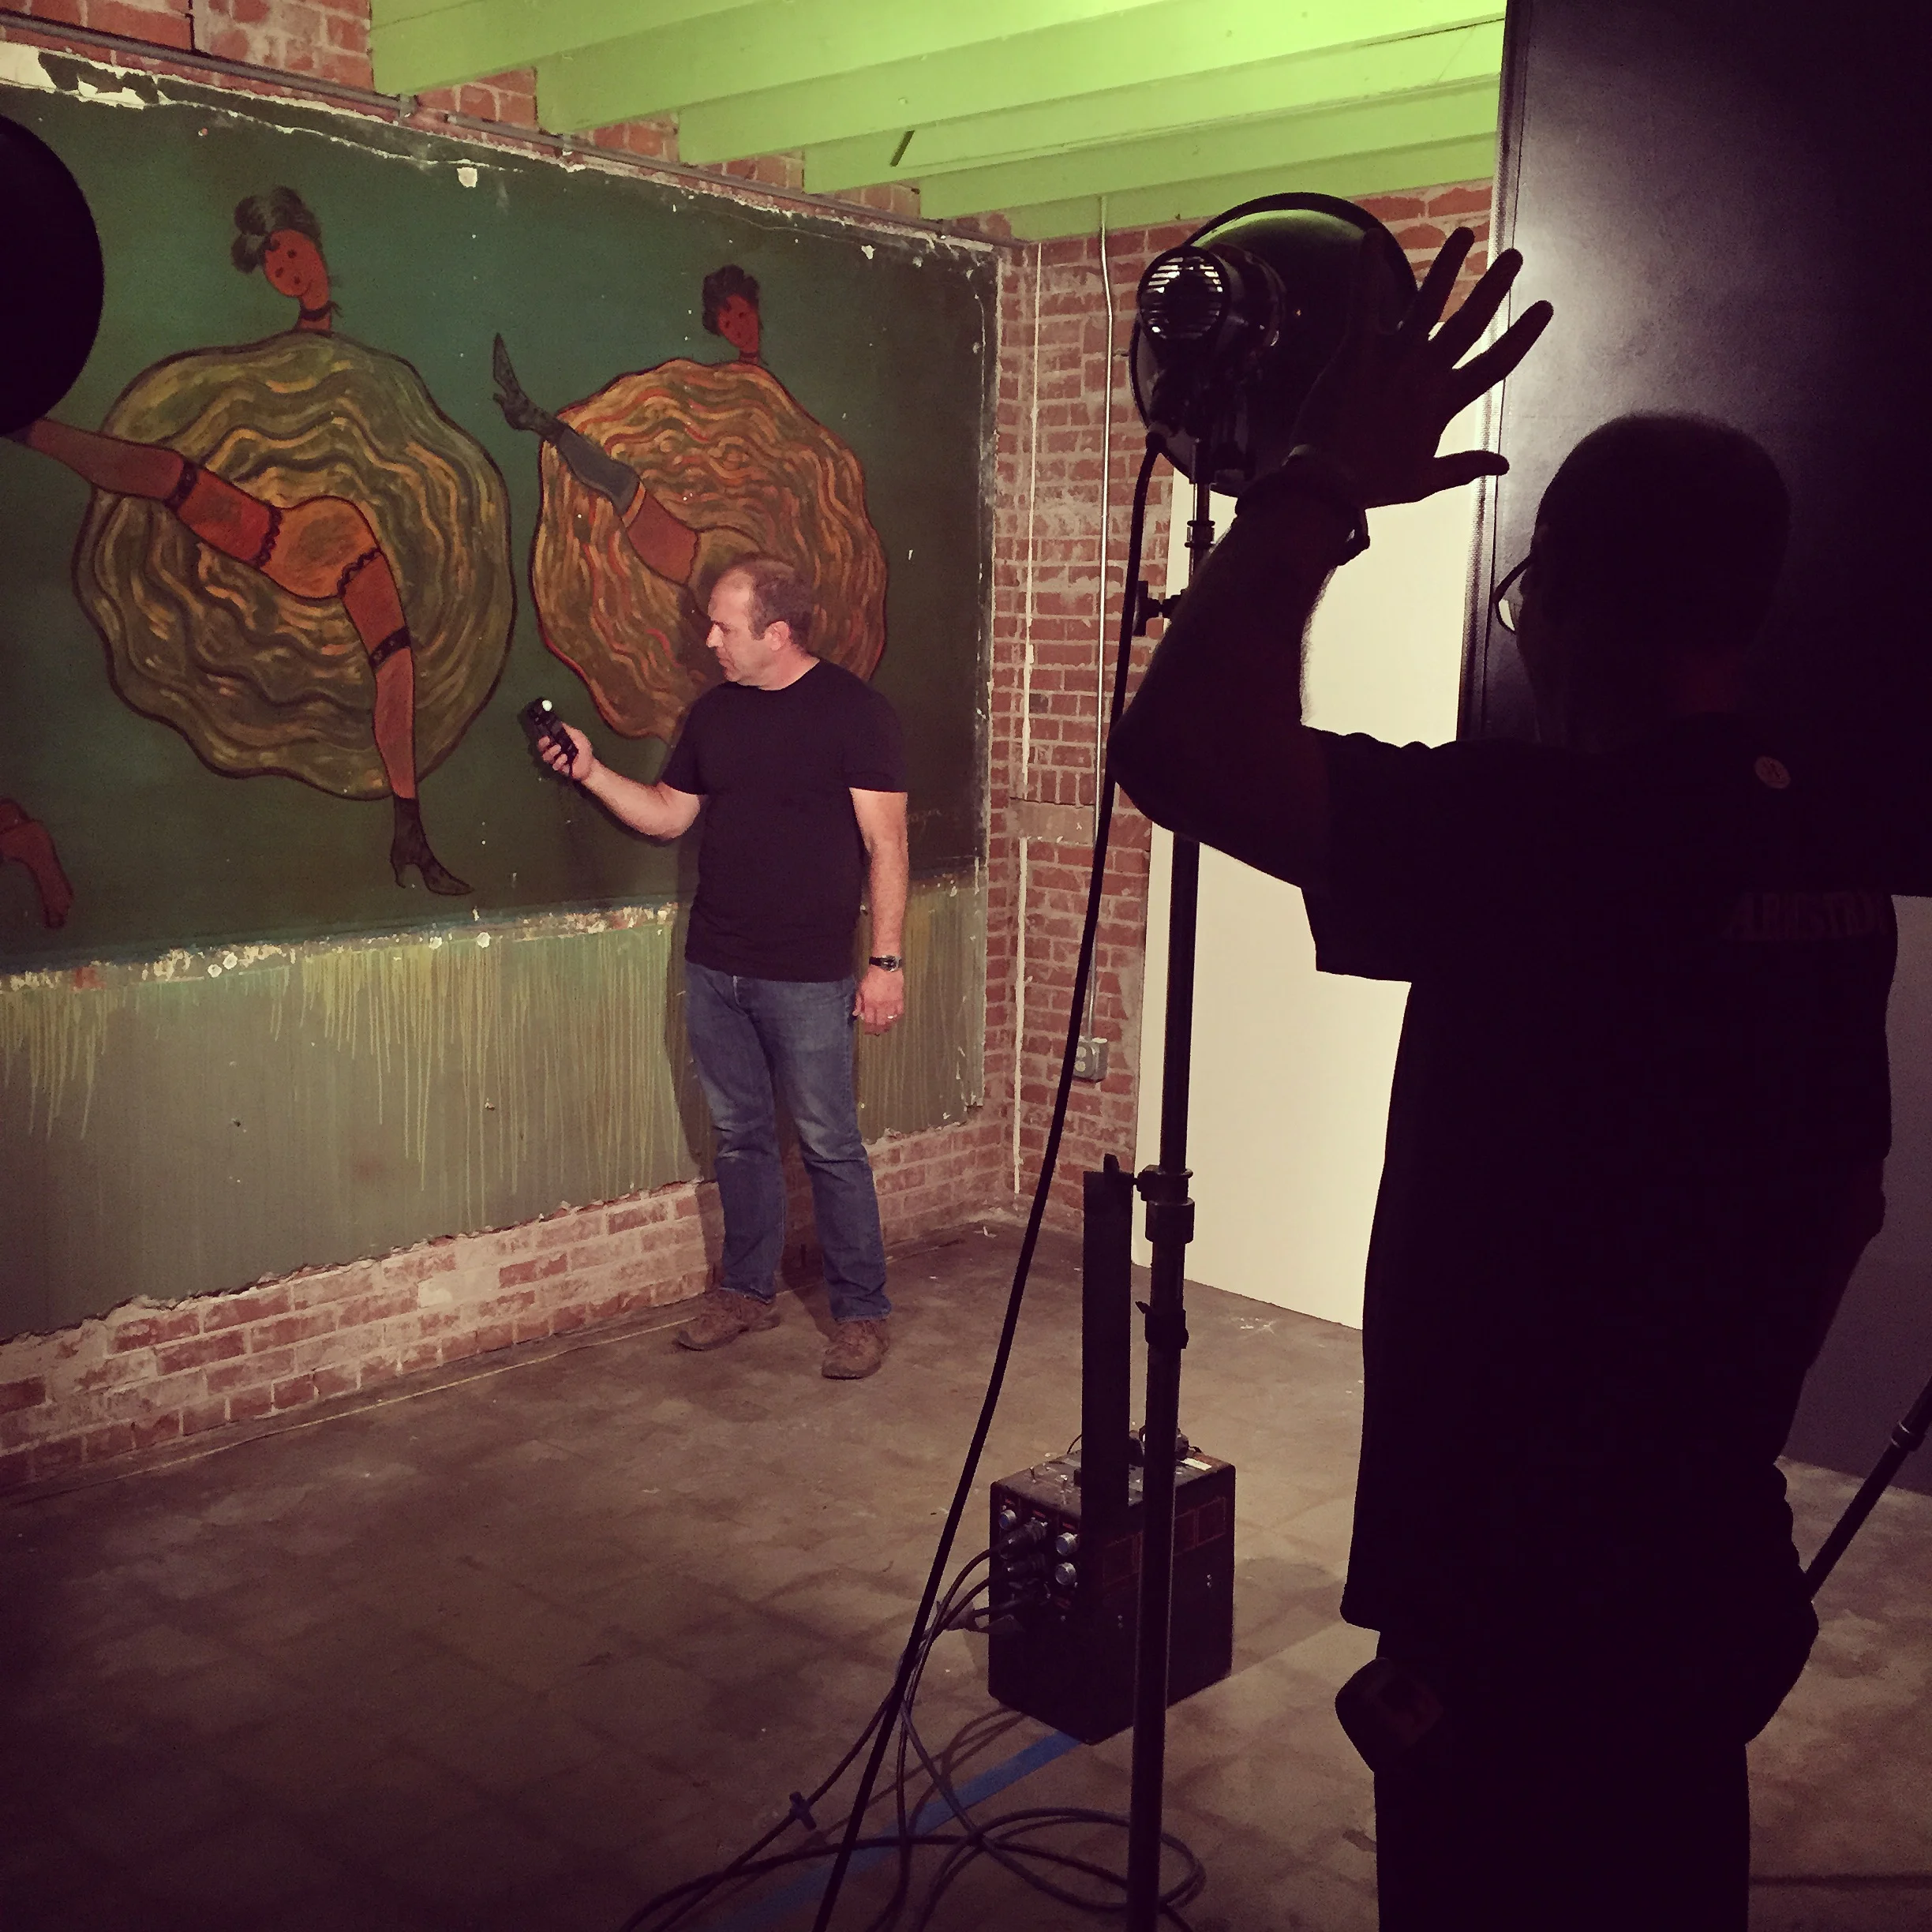
The murals are by renowned artist Ettore “Ted” DeGrazia, dated at some 60+ years ago. The building was a bar at the time, and legend has it that DeGrazia agreed to creation of these works in order to cover the cost of an unpaid bar tab.
Since I now work for Wayne, I get to enjoy the happy circumstance of assisting on the project.
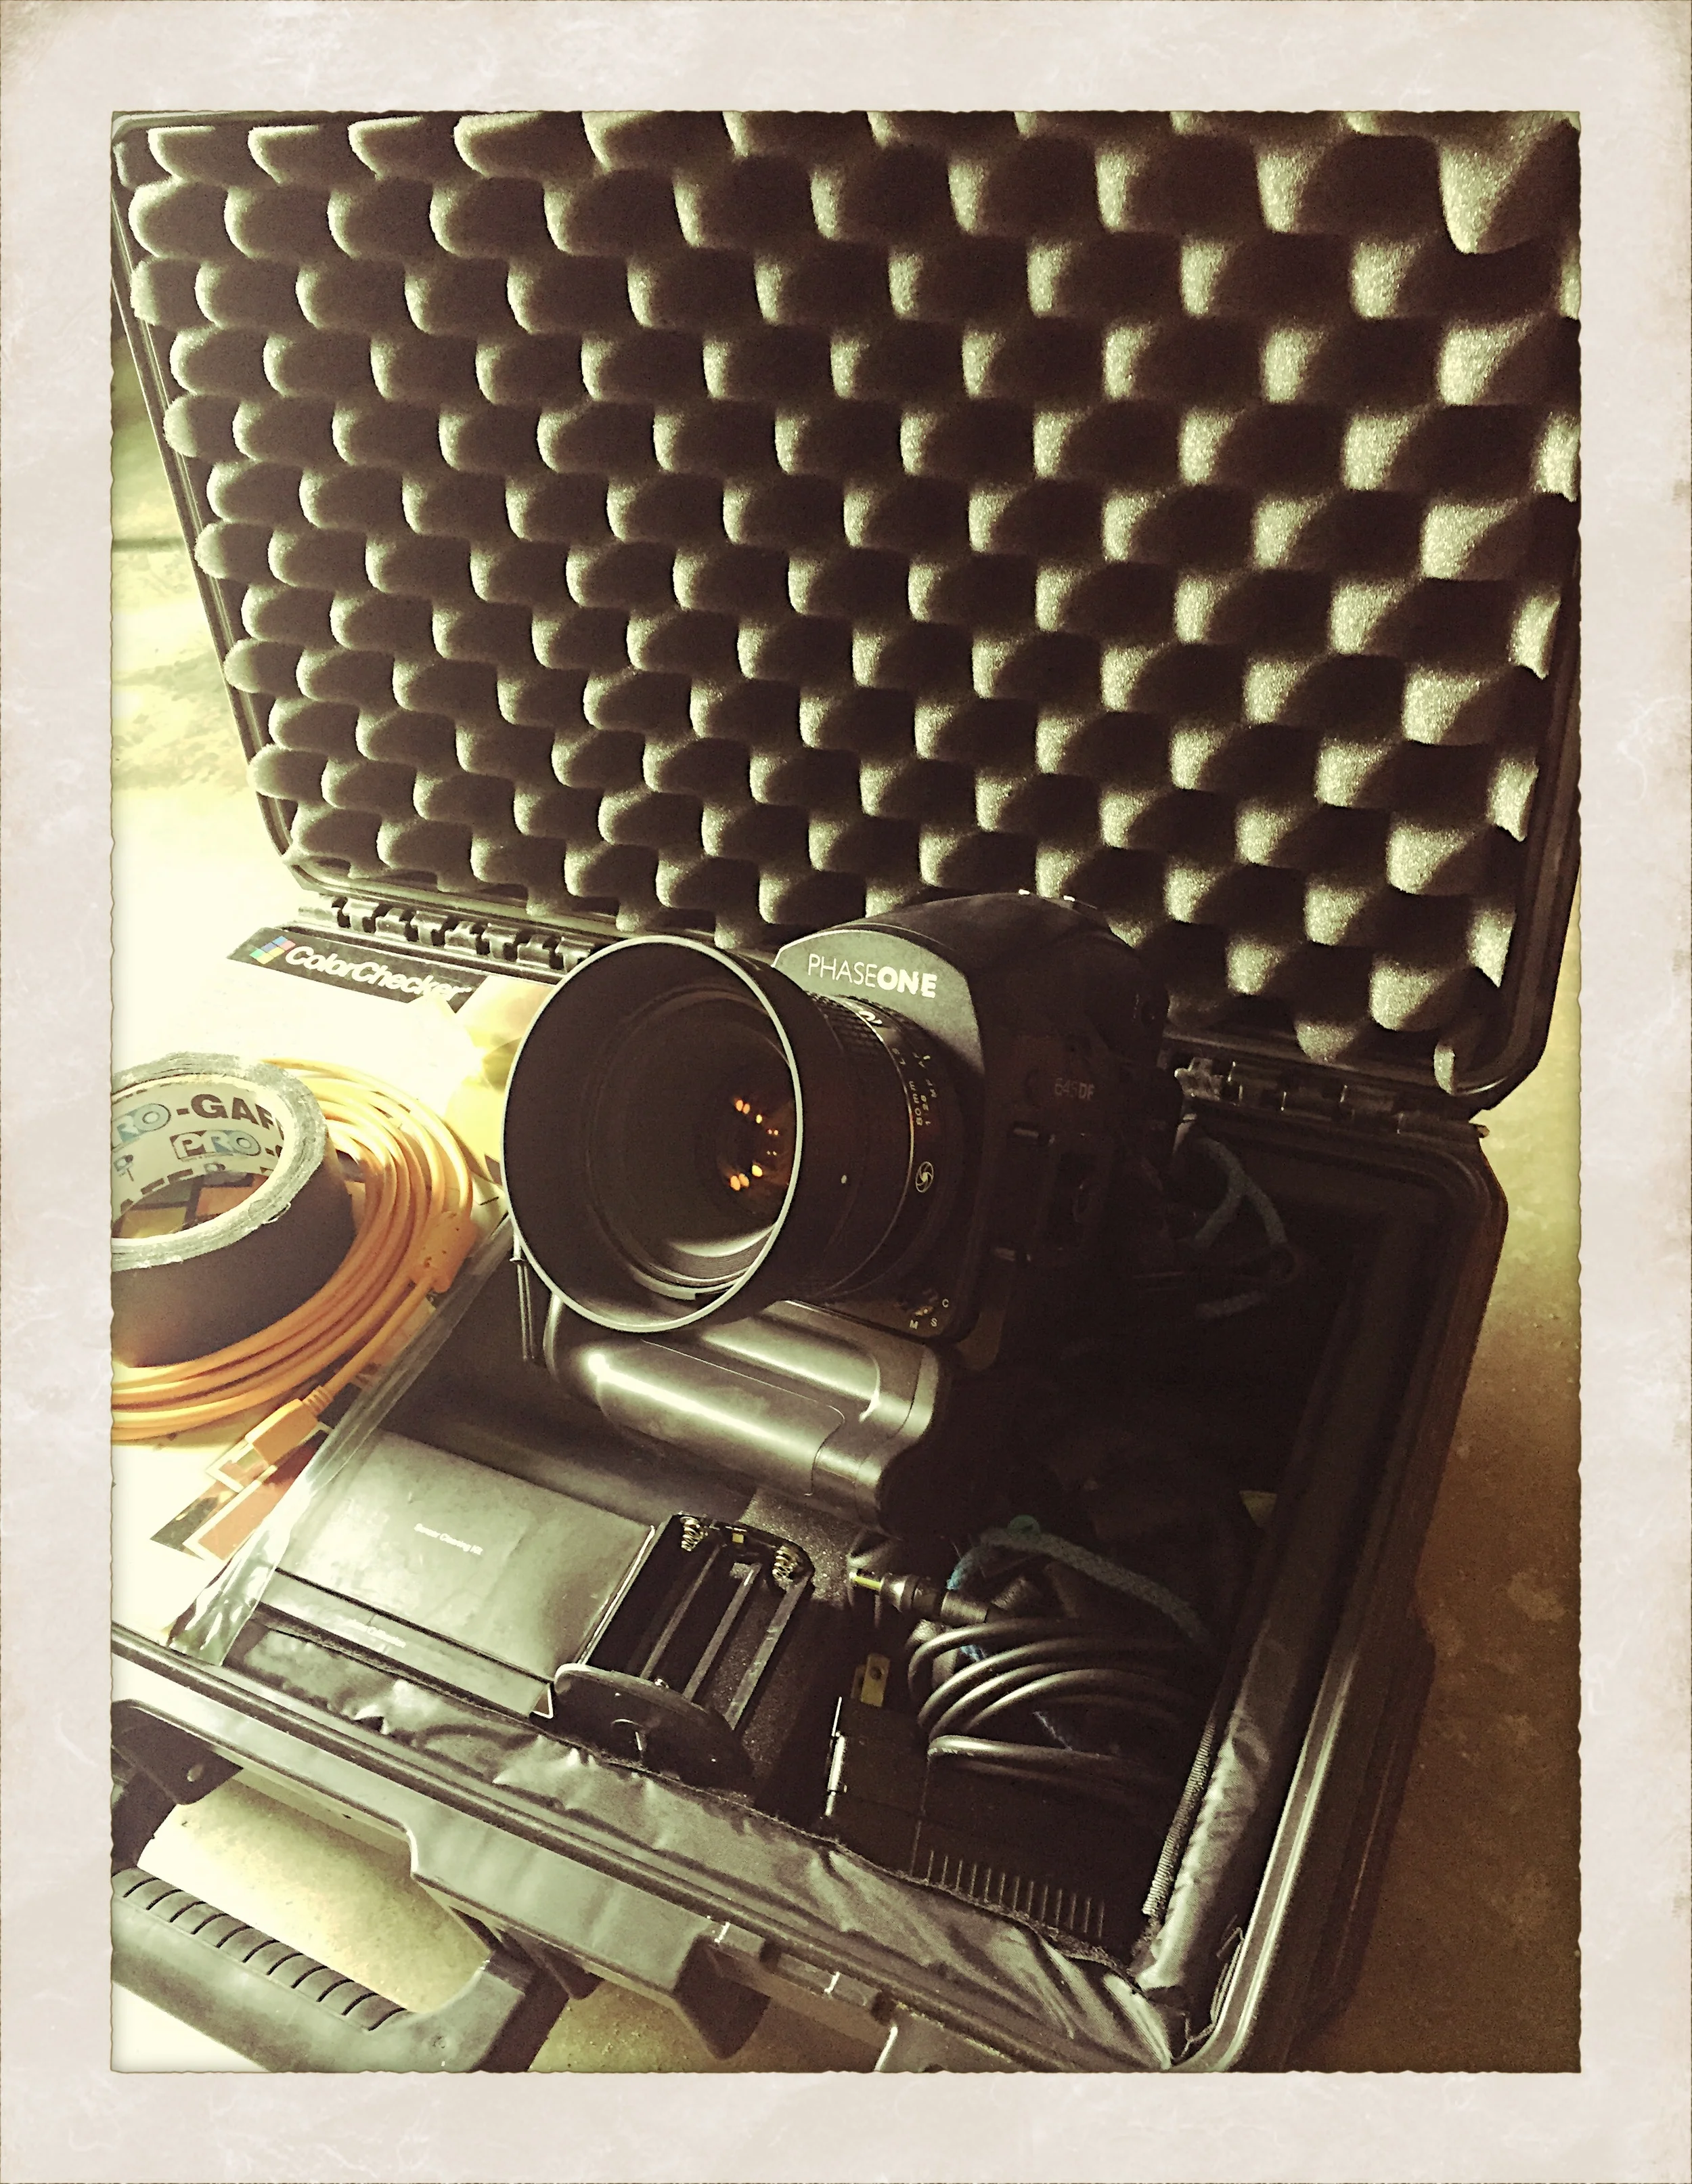
So we meet up at 8:30am and get to work. In addition to Wayne and myself, we have recruited help from Christopher ‘Boats’ OShana and Chadwick Fowler. Boats has an office here at the MonOrchid and has a lot of experience in photography. Chadwick is a local pro photographer, and it’s his rig we’re using today (the Phase One camera we’re using is valued at around $40,000!); he and Wayne have worked together many times before.
First, we assemble equipment. Fortunately, the murals are on interior walls, so we will have much greater control of lighting compared with an outdoor shoot. We grab Wayne’s hefty Speedotron equipment, a grip of stands, light modifiers, flash heads and cables, measuring tapes, computers, the camera, a hand-sketched plan, and of course, coffee.
Wayne has made it clear that in order for this shoot to finish a success, we will need to be exceptionally cognizant of precision in our set-ups. Because the mural is 48’ long, we will need to capture segmented frames and stitch them together in post-production. Each frame will need to be carefully planned so that it overlaps both the frame before it and the next frame in line. Lighting, camera angle, camera height, distance from the subject – all these factors and more will need to be strategically accounted for. Consistency across the work is key for ultimate integrity of the original and will be a necessity for post-production, too.
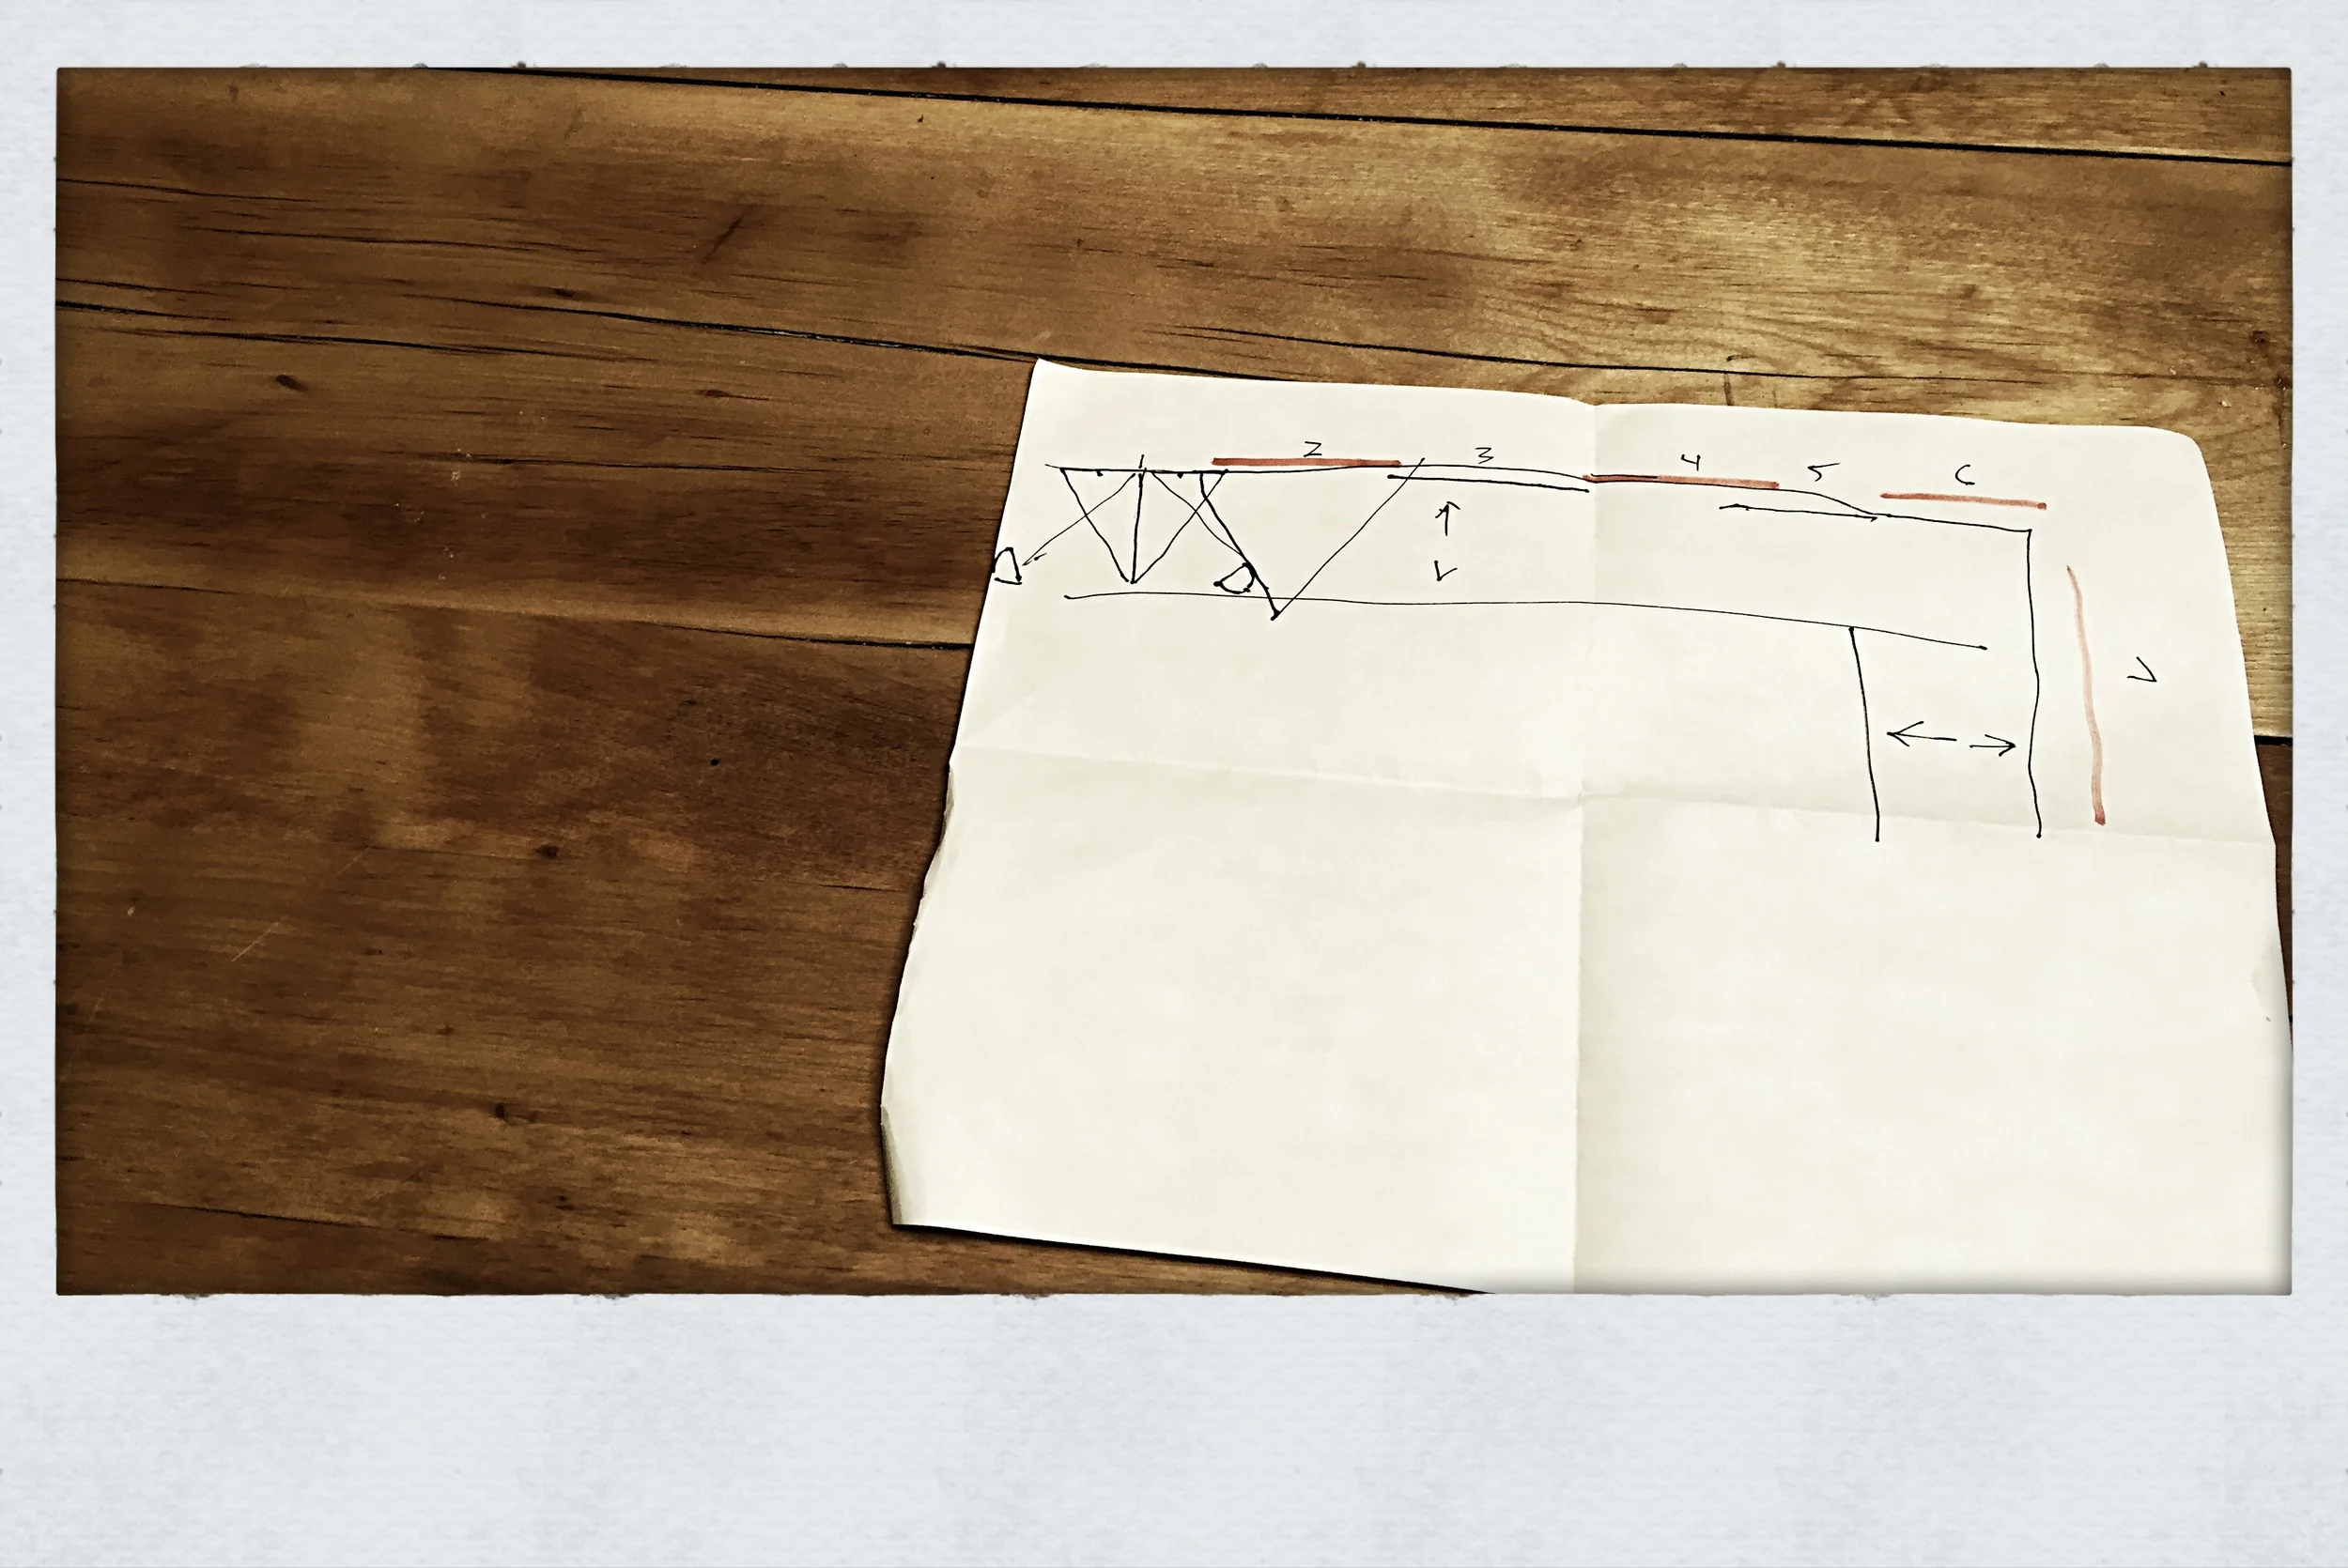
Once the camera’s up on the stand and we’ve got lights, we begin my measuring the height of the mural, finding its center point, then matching the center of the camera lens to that exact height. We position the camera at a distance from the wall that frames the work the way Wayne needs it. It happens to be exactly 12’ from the painting. Wayne and I walk to the opposite end of the mural, measure 12’ out from the wall, then draw a line of blue tape along the empty concrete floor to mark the distance.
Next, we need to position and direct the lights. We do this at first by eye, one light to either side of the camera, one large black barrier (called a flag) to each light. The flag blocks the light from hitting the camera, eliminating lens flair. While Boats helps Wayne set the lights, Chadwick levels the camera stand and the camera, and I take careful notes of all measurements (now we’ve added: distance of each light from the wall, distance of each light from the center of the camera stand, direction of each light with relation to the center of the frame).
Before we can take our first test shot, we need to measure light at multiple points within the frame. This is done by connecting the camera to the Speedotron pack and the lights via radio slave (radio slave: I tell Wayne this would make a really good band name), then calibrating the light at each point with a flash meter.
This is how we do it: Wayne stands at the mural with the flash meter, holds it to the top left of the frame. Chadwick flashes the lights from the radio slave, then Wayne checks the meter’s reading. Again at the lower left of frame. Center of frame, top right, bottom right and so on until there’s consistency across the frame. There’s much talk of “hot” and “cold” and “spectrals” and “flares” – all of which is new to me.
Finally we’re ready to shoot the first frame. It’s been well over an hour of preparation. Chadwick hits the shutter release. There’s a click and a flash, a few more clicks and adjustments, and finally a very good image populates the computer screen to his left. Wayne walks over for a look while Chadwick confirms focus. Wayne nods, grunts a simple, “Looks good,” then it’s over just like that. And we’re on to the next frame.
Measure four feet from every point (center of camera frame, center of each light frame, etc.) and shift to the right for frame two. Confirm all measurements, then retest the light. Adjust and reshoot. Confirm overlap and consistency, confirm focus, then shift.
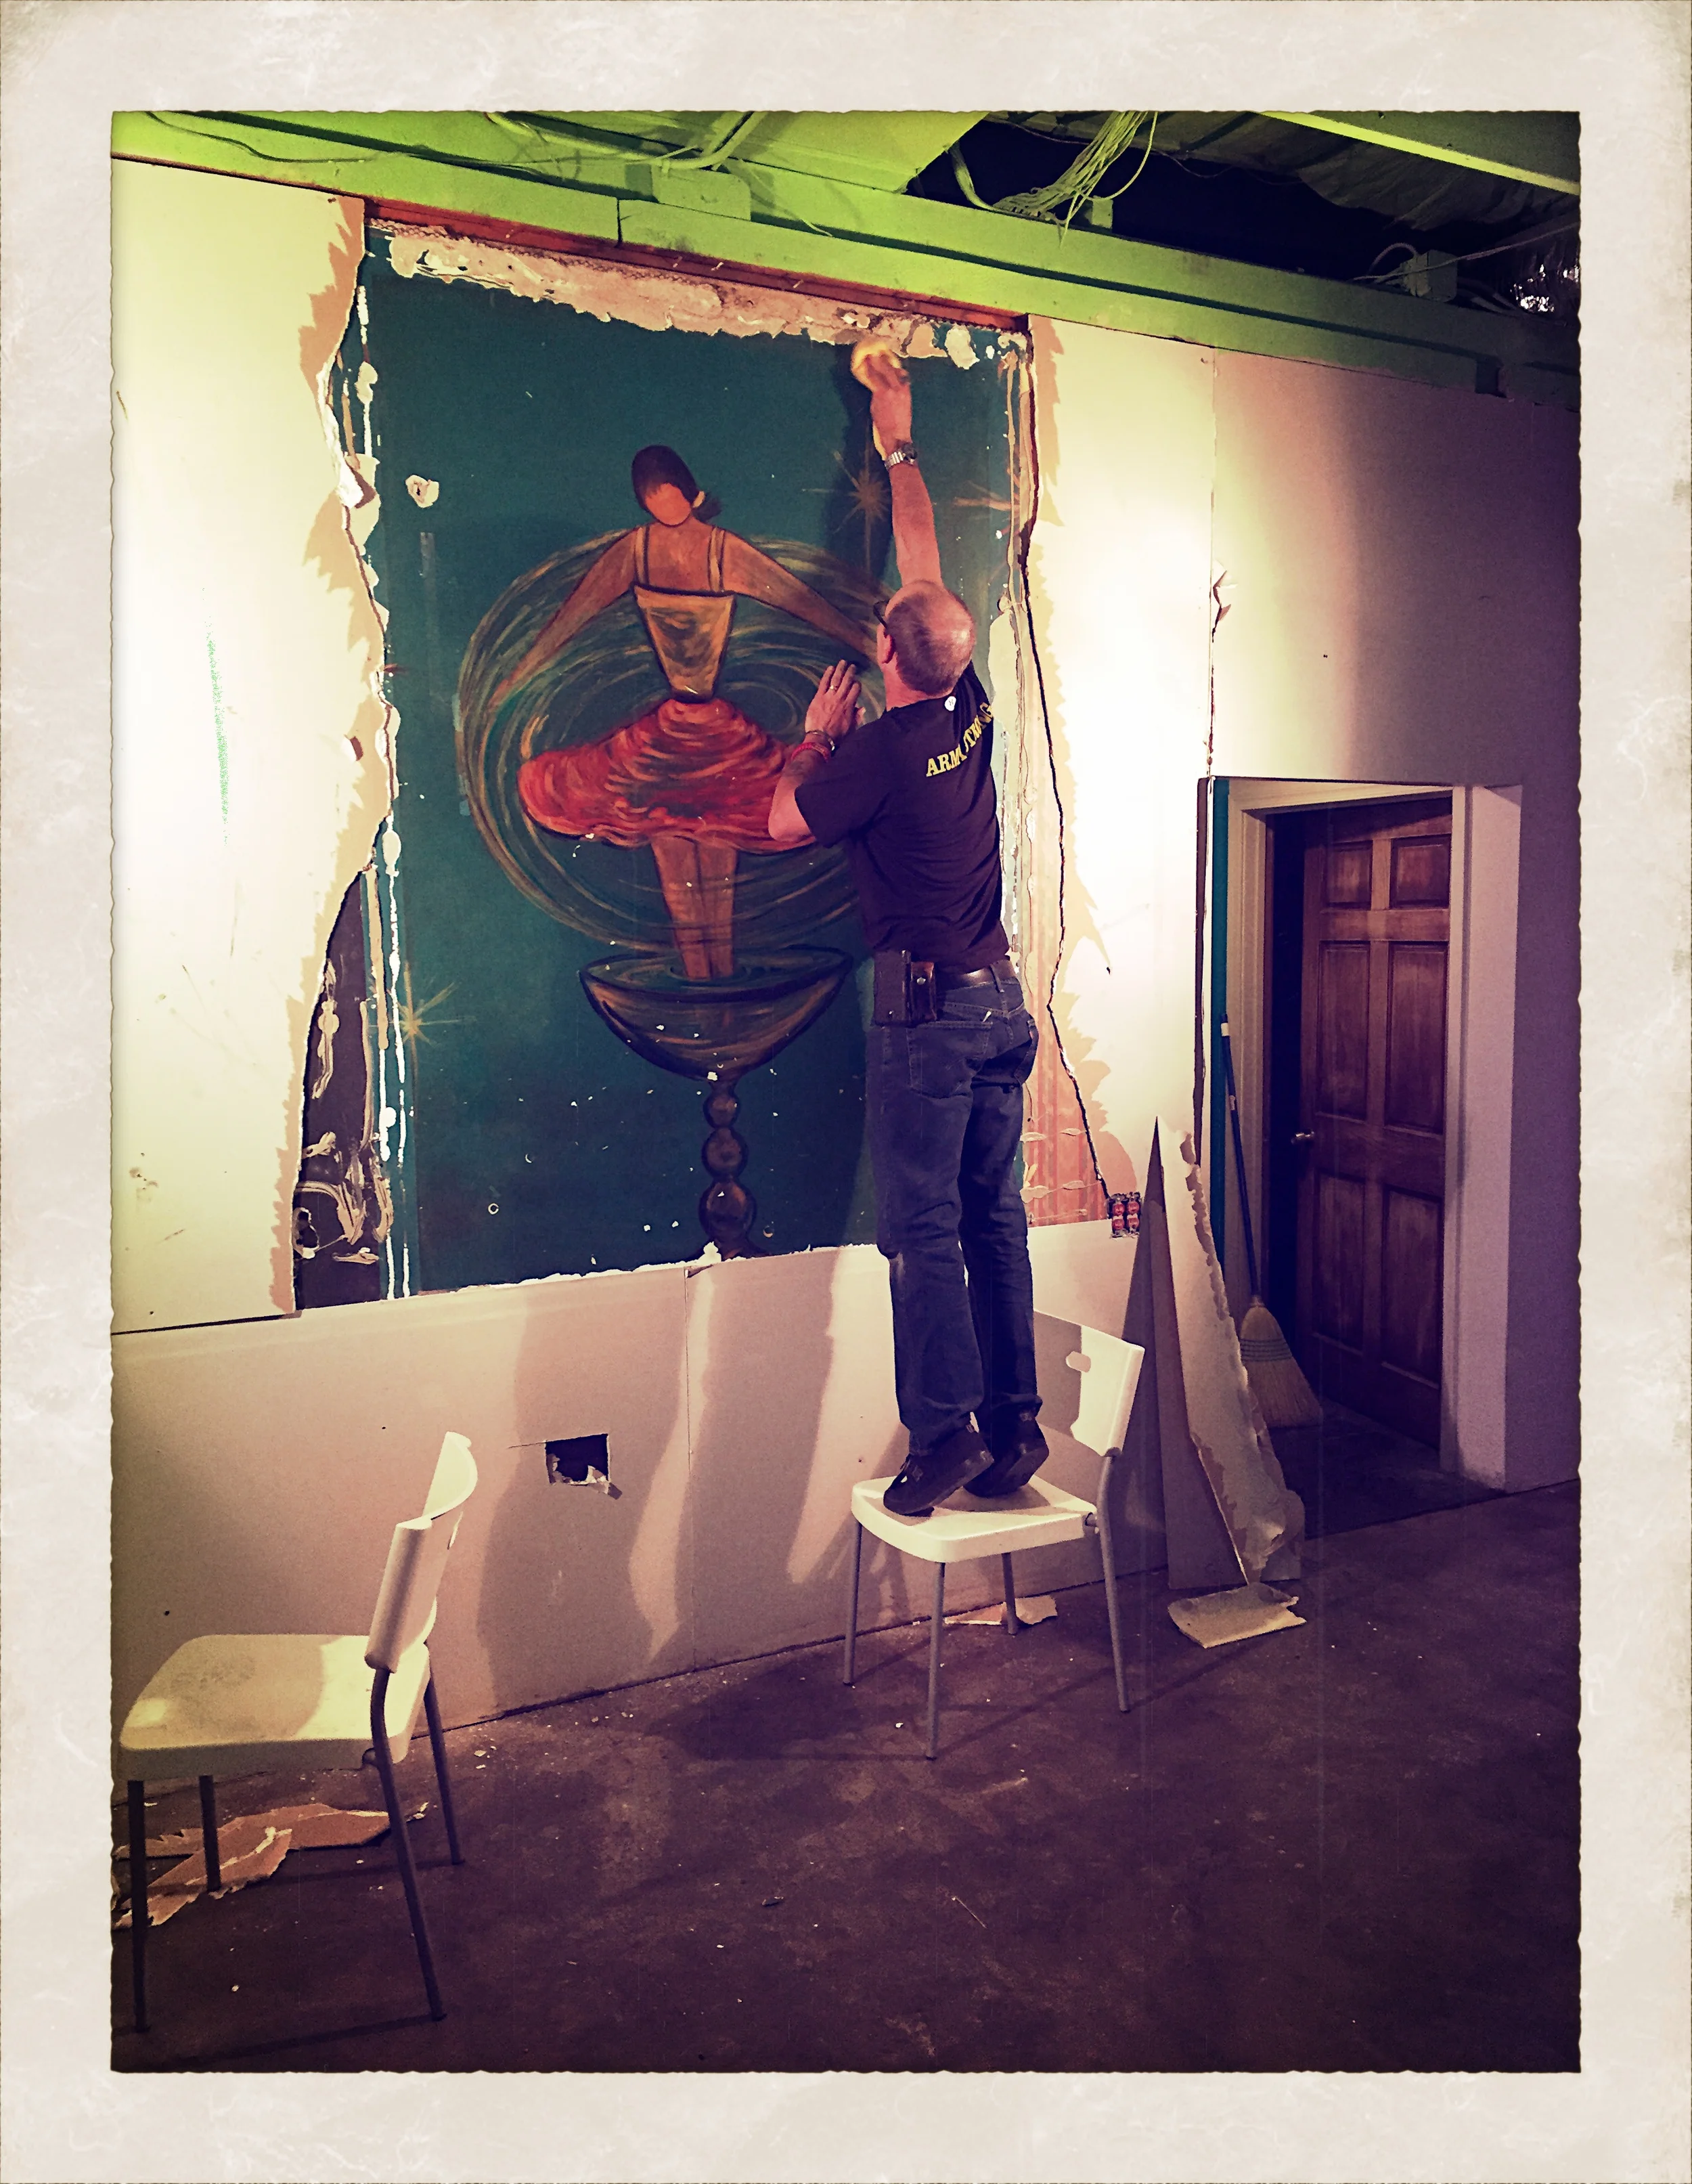
We move in a pretty steady rhythm until we get to the end of the mural, which extends into the very corner of the south and east walls. This is where lighting becomes a real trick, because we’ve lost the space required to set a light to right-of-camera.
Wayne and Boats tinker with light positioning, then meter points in the frame. Over and over again the left-of-frame meters significantly hotter than the right. Over and over again we readjust the lights, then test again. Eventually, we all decide to break. It’s been several hours on this shoot and it’s time to clear our heads.
Less than 10 minutes later, we’re back at it. Strips of gaffer tape hang from the dishes of each light, acting as additional “miniature flags” to lower the heat of the light in certain directions. We’ve tried lighting from multiple positions, we’ve tried reflecting light off portable white walls; we’ve tried flagging both lights, flagging only one light, adding and removing lights.
In the end, it’s Boats’ arm that saves us. As a joke, he throws his arm up in front of one light and says, “How ‘bout that? Does that fix it?” As a joke, Wayne snaps a shot. Unbelievably, he notices improvement. Tells Boats to do it again, move his arm just so.
Wayne snaps one more shot. Reviews it at the computer. Compares it to the last several frames. Checks the histogram, then turns and says, “That’s it – we’re done.”
After this it’s just a quick clean-up/set-up at the smaller painting on the north wall, a quick metering, a quick click and a quick flash, and we’re done with shooting for the day. Boats and I clean up while Wayne carries the computer to his desk to start on post-production. It’s been about 5.5 hours since we started.
By the time I leave MonOrchid some 3.5 hours later, Wayne and Boats are still at work on tweaking all the separate frames precisely into place. We may not have saved the painting, but we’ve done the best we can to help it last.
I realize just how fortunate I am – to be a part of this. To be a part of Wayne’s commitment to the people and the ethos here in Phoenix. So much of his effort goes unnoticed. (This time, though, I thought you all should know.)
Thanks for reading, and for caring; and for being a part of our community.
– Tim